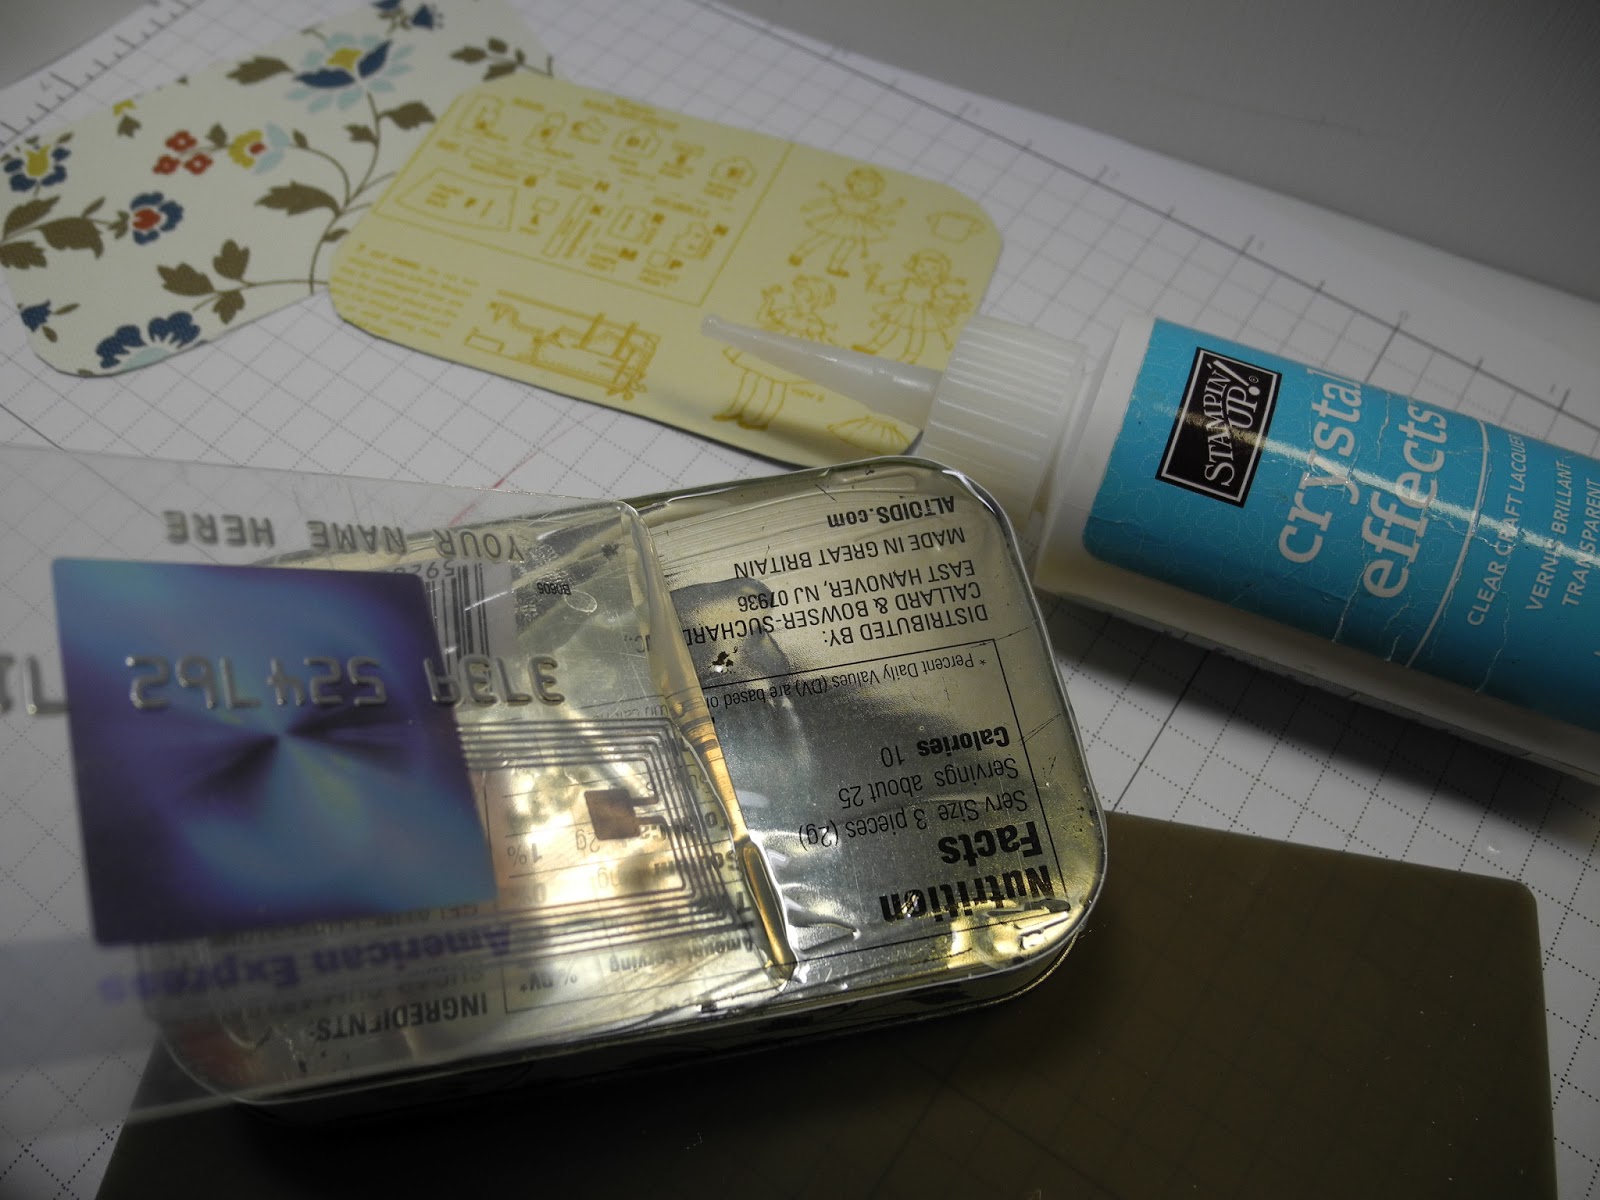
All you need are an Altoids® tin, designer series paper, some embellishments and Crystal Effects. A good pair of paper snips is a must; a pencil and one of those fake credit cards from your junk mail will also be quite useful.
Start by cleaning the tin, washing out the candy dust and drying it well. Trace the tin onto the designer series paper for the top (Print Poetry shown below) and the bottom and cut out the two pieces, cutting inside the traced lines. Test fit them and trim if necessary.

Cut two strips of designer series paper (I used retired Comfort Cafe for this tin) 12" long and 1/2" wide for the sides. The strip that covers the bottom half of the sides should only extend to the lid when it's closed, not under it. For both of the tins I've altered, the width of the bottom sides was exactly 1/2". Starting at the center back of the tin, spread a thin layer of Crystal Effects on the tin (that fake credit card makes an excellent spreading tool!) and smooth the strip of designer series paper onto the tin.

Continue around the corner and the end, spreading Crystal Effects and smoothing the paper down, and keep going around the tin, spreading CE and smoothing the paper down. Before you glue down the last part at the back, trim off the excess paper to leave just a small overlap.

Use the fake credit card to spread a thin layer of Crystal Effects on the bottom:
Press and smooth the paper down all over, especially at the edges. I wasn't too worried about perfection for the bottom and you can see a very slight gap in the upper right corner where the base piece doesn't quite meet the edge piece.


If you want ribbon on the edge, I recommend Sticky Strip. Apply it to the ribbon first, burnishing it on, then apply the ribbon to the tin, again burnishing it on. I started in the center front, and added a bow over the seam. I used Crystal Effects to attach the bow - it took more than I expected and took a long time to dry, but it seems to be very secure now. I held it in place while it dried with a wooden spring-action clothes pin (a binder clip would work, too).

Cover the bottom of tin with a thick layer of Crystal Effects. Draw it along one edge, using the tip of the bottle to push the CE right to the edges.


Cover the paper on the sides of the tin with a layer of Crystal Effects and let it dry. The edges don't get as much wear, so I only put on a thin layer. Don't spread CE on the hinges, just around them.
Arrange your embellishments on the top and stick them in place with Crystal Effects. If you have a stamped element, the top layer of Crystal Effects will cause the stamping to blur. I used Versamark and clear Stampin' Emboss powder on my name banner to keep it from blurring, but for some stamped images a little blurring might be artistic.

When the CE holding the embellishments is dry, start your thick top layer by going around the raised embellishments first. The Cajun Craze card stock sizzlit button needed a little supporting CE under the edge, and I also covered the tops of all the buttons. Working out from the embellishments, filling in between them first, add and spread CE using the bottle tip. Work out towards the edges, and push the CE right up to the edges of the tin.

In the photo below, you can see that it becomes clear when it's completely dry:


9 comments:
Thank you for posting this tutorial. I wonder how many tins you can get done with one bottle of Crystal Effects? I had not thought to use CE for this purpose, and I will have to try it! Thank you again for this post but also for emailing me to inform me of this tutorial. :)
That's a question I've been wondering, too, Terri, how many you can do with one bottle. I had used some CE before so my bottle wasn't full, and I've done the two tins so far. I enjoy doing these and I really like the plastic-like finish, so I will be ordering another bottle soon to be sure I don't run out in the middle! I'll let you know if I find the limit.
I absolutely LOVE Crystal Effects and use it quite happily for a lot of my projects. Not only does it make them last better, but it also gives it a professional finish. Your Altoids container "make-over" is gorgeous! I love your creativity. I will definitely be trying this myself. Who doesn't need an adorable container for those important odds and ends? Thanks so much for sharing. :)
Thanks for the awesome tutorial. I haven't done these little containers for many years, and had forgotten how cute they were. I like the sewing kit notions idea. When I did mine I used them as a first aid kit and had a alcohol wipe, a bandaid, a small package with aspirins and a roll of tums. What fun. Yours are excellent and I like the Crystal Effects Idea.
Great job! Thanks for doing that. Love you tin.
Thank you so much for posting this. I've been trying to figure out ways to upcycle some empty canned chicken containers. With my can opener, there are no sharp edges, and the lid pops back on. This technique might be just the ticket.
CUTE project Kathe !! I will have to try one myself !! TFS and have a great weekend !!
Thanks so much for posting this! I've got year-end teacher gifts still ahead of me, and while I've made tins like this in the past, yours is much nicer, and now mine can be, too!
Wow! Great clear tutorial too.
Post a Comment